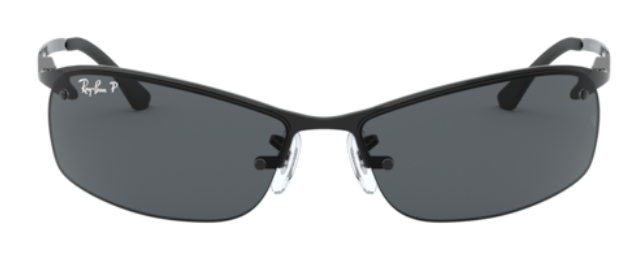
The lenses on the Ray-Ban 3183 are screwed to the frame with two screws per lens, the ones you can see from the front. To replace them, you just loosen those screws, take out the old lens, fit the new one and tighten them again. It looks more complicated than it is.
The RB3183 is a small, lightweight and very comfortable model. Since the lens is held by screws rather than press-fitted, there is no need to heat anything: a precision screwdriver and a little care are all it takes.
Before you start
Check your reference
On the inside of the arm you will see the full reference printed: the model (RB3183), the color code and the lens and bridge measurements, in the same format as on any Ray-Ban (for example, “RB3025 001 58□14” on an Aviator). Write down the lens size, that is, the first number of the measurements, because the new lens has to be exactly that size.
What you need
- A 4-in-1 precision screwdriver (available on our website).
- A microfiber cloth to handle the lenses without leaving fingerprints.
- A small container for the screws.
- The new lenses: original Ray-Ban 3183 replacement lenses or compatible lenses.
Step by step: how to replace the RB3183 lenses
- Take the 4-in-1 screwdriver and remove the top part to expose the right tip.
- Rest the glasses on the cloth and loosen the two lens screws, the ones you can see from the front.
- Carefully remove the old lens.
- Put the new lens in position, lining up its holes with those in the frame.
- Tighten the screws with the screwdriver, alternating between them so the lens sits evenly.
- Repeat the process with the other lens.
When you have finished, check that the lenses don’t move and that they are straight. If one is slightly tilted, loosen it a little, reposition it and tighten again.
A trick to avoid mistakes
Always work with only one lens out of the frame. While you replace the left one, the right one stays in place and serves as a reference for the correct orientation: which edge goes at the top and which way the wider part faces. Before removing the old lens, also check whether there is a small washer or bushing next to the screws; if so, put it back in exactly the same position when you fit the new lens.
Common mistakes
- Tightening one screw all the way before the other. The lens can end up crooked or under stress. Tighten both a little at a time.
- Overtightening. The screws only need to hold the lens; too much force can damage it.
- Mixing up left and right. Each lens has its own side. Replace one lens at a time and you will never get it wrong.
- Losing a screw. They are very small. If one is missing or has a worn head, you will find it in Ray-Ban 3183 spare parts.
- Touching the lenses with your fingers. Use the cloth so you don’t leave fingerprints.
Frequently asked questions
Do I need to heat the frame?
No. On the 3183 the lenses are held by screws, so there is nothing to heat.
What is the difference between original and compatible lenses?
The originals are genuine Ray-Ban parts; we have been a certified EssilorLuxottica distributor since 2018. Compatible lenses are a good-quality alternative at a lower price. Both come with a 3-year warranty against manufacturing defects.
How do I know which lens size to order?
Check the markings on the arm: it is the first number of the measurements. If it has worn off, write to us with a photo of your glasses and we will check it for you.
Can I replace the arms too?
Yes. We have original Ray-Ban 3183 arms and a dedicated tutorial on replacing them, because there is a small trick involving the hinge tab.
Spare parts for your Ray-Ban 3183
With new lenses, your glasses will look as good as new. Standard shipping is free on orders over $ 50.53. If you have questions about the size, color or fitting, write to us and we will help you by email.
Looking for a replacement part for your glasses?
Type the model engraved on the temple arm and we'll show you everything that fits.